


In this post I want to share some notions of machine learning and a how-to get started with Microsoft Azure ML studio.
Machine learning is a quite complex topic, especially if you want to understand the theory and algorithms that are behind it. If you want to go deeper in understanding ML I would encourage you to register for the free online course by Andrew Ng on coursera.org. I have done it, it is really great but be ready to invest enough time and brain waves J.
Thankfully, ML studio offers a simple way to do machine learning without the need of understanding any of the algorithms as long as you follow a workflow. My simplistic workflow is split in 4 steps: data acquisition, data preparation, training and tuning, web-service deployment. Let me go through all these steps.
Machine learning
Data acquisition
Machine learning needs two things to work, data (lots of it) and models. When acquiring the data, be sure to have enough features (aspect of data that can help for a prediction, like the surface of the house to predict its price) populated to train correctly your learning model. In general, the more data you have the better so make to come with enough rows!
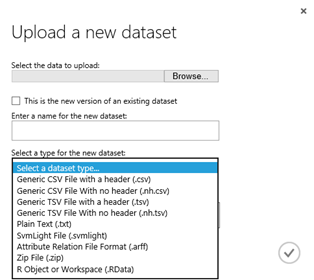
Data is generally stored as a CSV file (comma separated value file created with excel) or any other supported type of dataset. Currently the supported max size is 1.95 GB (which is enough for anything not “big-data”).
Handling the data: data preparation
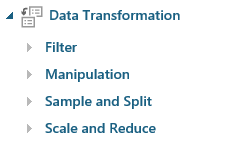
Once you have the data available from Azure ML, it’s time to prepare it. There are multiple transformation operations supported: filtering, manipulation, sampling, and scaling and reducing. Full documentation for data transformation. To start, you would want to scrubber missing values, edit the columns, and then split your dataset for training and validation. This will be fed to your training model along with the learner selected.
Training and tuning
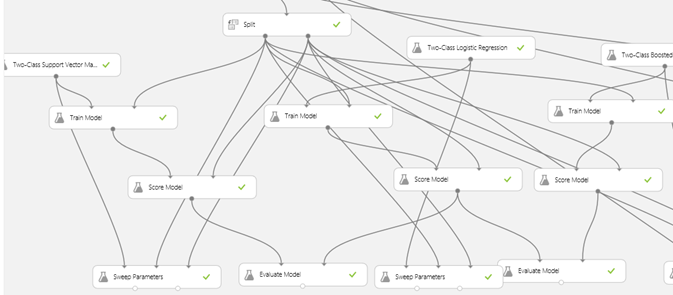
The first thing you need to figure out first is what type of analysis you need to run (see full documentation). It can either be a classification analysis (spam vs non-spam), a clustering analysis (automatic classification), or a regression analysis (for prediction and forecasting). Once you have this figured out, what you need to do is compare the results of multiple models to know which one is the most efficient for your dataset. The logic here is to:
- Select a model with default value
- Train the model
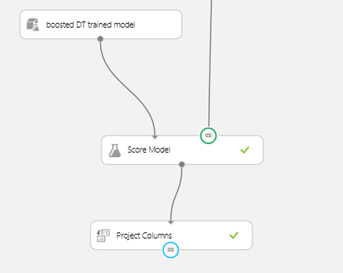
- Score the model
- Evaluate the model (to figure out which model is the most efficient)
- Sweep the model (to figure out the best configuration for your model)
- Evaluate the model
- Save the trained model (to be used in production)
Some useful notions for evaluation each mode (from here):
For each error, a smaller value indicate a closer match. For CoD, the closer it is from 1.0 the better the prediction.
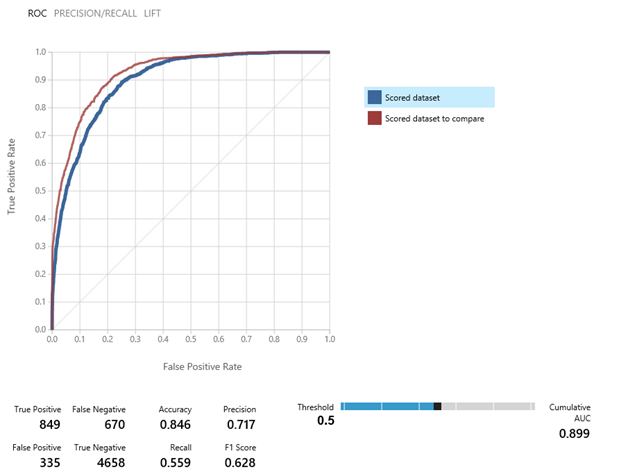
When comparing the evaluation of models, you will want to validate that the main values are going up (like accuracy (proportion of true results to total cases), precision (true over all positive results) and recall (fraction of all correct results returned by the model), AUC (Area Under Curve – provide a single number that let compare different model), F1 score (measure of accuracy balancing precision and recall)). See Metrics used for model evaluation for more details.
Deployment
Assuming above steps are completed and you have found satisfactory values for your model evaluation, you can clean-up your workflow to have only one model, with the optimum configuration. Publish you score model as an input and define your output. Run and publish your web service. From there you will have access to the API help page containing sample code for C#, R, and Python and a test URL where you can manually set some values.
In your web service configuration tab, you can enable it as ‘ready for production’ and start using it in real production project!
Resources
Machine learning for beginners.
If you want to go deeper in understanding ML, Andrew Ng have a fantastic class on coursera.org.
All the videos tutorial that you need to get started with Azure ML.
Predictive solution walk-through.
Pingback: Azure Machine Learning Deployment at Scale Using ARM and AMLPS. | Ahmet Gyger's web log